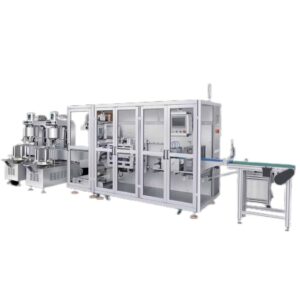
Your packaging line just went down mid-shift. Again. The operator tells you the seal jaws aren’t closing right, the film keeps tracking off, and there’s a grinding noise coming from the drive system. You’re looking at two hours of lost production (minimum), and a rush call to your service technician.
I’ve been on the receiving end of those calls more times than I can count. And here’s what I’ve learned: nearly every unplanned packaging machine shutdown I’ve diagnosed could have been prevented with a simple, consistent maintenance routine. Not a complicated one. Not an expensive one. Just consistent.
This packaging machine maintenance checklist is the one I wish every plant manager had pinned to their machine room wall. It covers what to check daily, weekly, monthly, and quarterly, with specific values to measure, parts to inspect, and the red flags that tell you something’s about to fail. Whether you’re running a vertical form-fill-seal machine أو أ آلة تعبئة الأكياس, these routines will keep your line running.
Key takeaways:
- A 5-minute daily maintenance walk can prevent a large share of unplanned packaging machine downtime: seal jaw inspection, film path cleaning, and air system drain are your highest-impact checks
- Weekly tasks like lubrication of grease points, belt tension verification, and sensor cleaning catch the slow-creep failures that operators don’t notice during production
- Monthly preventive maintenance should include electrical connection inspections, PLC backup verification, servo encoder alignment checks, and full calibration of fill systems
- Quarterly deep maintenance covers seal jaw replacement assessment, gearbox oil changes, pneumatic valve rebuilds, and complete machine alignment: this is where you prevent catastrophic failures
- Building a spare parts inventory around your machine’s critical wear items (seal bars, heating elements, Teflon tape, belts, sensors) reduces mean time to repair from days to hours
- Professional service should be scheduled annually at minimum, and sooner if your machine runs multiple shifts or handles abrasive products
Why Do Packaging Machines Break Down at the Worst Times?
Because most packaging equipment failures are slow-developing problems that go unnoticed until they cross a threshold, and that threshold always seems to get crossed during a high-priority production run.
Packaging machines don’t fail without warning. They whisper first. A seal temperature that drifts 2 degrees a week. A belt that loses a millimeter of tension per shift. A pneumatic fitting that leaks a tiny bit more air each day. The machine compensates automatically up to a point. Then it can’t anymore, and everything falls apart at once.
I see this pattern constantly. A VFFS machine runs fine for three months with zero maintenance attention. Then the seals start failing. The operator bumps up the seal jaw temperature to compensate. That works for a week. Then the film starts wrinkling because the higher temperature changes how the film behaves on the forming collar. The operator tightens the film tension. That works for a few days. Then the film tears because the tension is too high for the now-hotter seal area. And now you’ve got a full-blown crisis that started with a dirty sensor or a slightly worn belt three months ago.
Preventive maintenance interrupts this chain before it starts. It’s not glamorous work. Nobody high-fives you for cleaning a sensor that wasn’t causing a problem yet. But that’s the point: it wasn’t causing a problem yet.
And when something does break despite a solid routine, our packaging machine troubleshooting guide walks through the most common failures and how to fix them fast.
What Preventive Maintenance Actually Costs vs. What Downtime Costs
Let me put some indicative numbers on this. A typical VFFS preventive maintenance program costs roughly $150–$300 per month in labor and consumables (cleaning supplies, lubricants, small replacement parts). That’s $1,800–$3,600 per year.
Unplanned downtime on a mid-speed packaging line? You’re looking at $2,000–$8,000 per hour in lost production, wasted materials, and labor costs. A single catastrophic failure (a burned-out servo motor, a seized gearbox, a destroyed forming collar), can run $5,000–$20,000 in parts and service, plus two to five days of downtime while you wait for replacement parts.
The math isn’t complicated. Preventive maintenance isn’t a cost. It’s insurance with a guaranteed positive return.
Here is the full routine at a glance:
| Interval | Time | Core tasks |
|---|---|---|
| Daily | 5 min | Seal jaws, film path, air drain, air pressure, seal temperature, listen |
| Weekly | 30-45 min | Lubrication, belt tension, sensors, cutting blade, pull belts, electrical connections |
| Monthly | 2-3 hours | Fill calibration, heating elements, PLC backup, pneumatics, film path alignment |
| Quarterly | Half a day | Seal jaw assessment, gearbox oil change, valve rebuild, full alignment, electrical deep check |
Daily Maintenance Checklist (5 Minutes That Save Hours)
Spend five minutes at the start of every shift on these checks and you’ll eliminate the majority of surprise breakdowns.
This is your frontline defense. I’ve structured these checks so an operator can walk through them quickly before starting production. Print this section. Laminate it. Tape it to the machine.
1. Clean the Seal Jaws
This is the single highest-impact daily task. Film residue builds up on seal bars during every production run. That residue acts as an insulator between the heating element and the film. The machine compensates by drawing more power to maintain seal jaw temperature. The thermocouple reads correctly, but the actual heat reaching the film decreases. Your seals get weaker.
What to do: Wipe both seal jaws with a clean cloth dampened with isopropyl alcohol. Check the Teflon tape or coating. If it’s worn through, showing metal underneath, replace it before starting production. Running bare metal seal jaws against film causes sticking, contamination, and uneven heat distribution.
For SS304 contact parts: Use only non-abrasive cleaners. Abrasive pads scratch the stainless surface, creating microscopic grooves that trap residue faster and accelerate contamination buildup.
2. Inspect the Film Path
Run your eyes along the entire film path: from the unwind stand, through the tension rollers, across the dancer rollers, around the forming collar, and down to the sealing area. Look for three things:
- Film scraps or debris caught on rollers or guides. These create uneven tension and tracking problems.
- Loose or misaligned guide rollers. A roller that’s shifted even slightly changes the film’s entry angle into the forming collar.
- Worn or grooved rollers. If you can feel a groove worn into a roller surface, it needs replacement. The groove creates a track that forces the film into an uneven feed.
3. Drain the Air System
If your machine uses pneumatic seal jaws, pneumatic product gates, or any air-operated components, drain the moisture trap on your air preparation unit every shift. Compressed air contains water vapor. It condenses in the lines. That water reaches your pneumatic cylinders and causes corrosion, slow actuation, and inconsistent seal pressure.
Open the drain valve at the bottom of the FRL (filter-regulator-lubricator) unit. Let the water drain out. Close it. Ten seconds.
4. Check Air Pressure
Verify that the air pressure gauge on your machine reads within the specified range: typically 4–6 bar (60–90 psi) for pneumatic seal systems. Low air pressure means weak seals. High air pressure crushes the film and accelerates seal jaw wear. If the pressure is outside range, adjust the regulator and note it in your maintenance log. Persistent pressure drops indicate a leak somewhere in the system.
5. Verify Seal Temperature
Check the HMI or PLC display. The set temperature and actual temperature should match within 2–3°C. If the actual temperature is lagging behind the set point, your heating element is degrading or your thermocouple is failing. Don’t ignore this. A heating element that’s struggling today will fail completely next week: always during a rush job.
6. Listen and Feel
This sounds unscientific, but it’s one of the most effective checks. Run the machine empty for thirty seconds. Listen for unusual sounds: grinding, squealing, clicking, rattling. Feel the machine frame for unusual vibration. Experienced operators can often detect a worn bearing, a loose timing belt, or a misaligned gearbox just by sound and feel. If something sounds different than yesterday, investigate before loading product.
Weekly Maintenance Tasks
Weekly checks catch the slow-drift problems that daily inspections miss: misalignments, wear patterns, and contamination buildup that develop over days rather than hours.
Schedule 20–30 minutes for weekly maintenance. I recommend doing this at the end of the last shift on Friday or the start of the first shift on Monday: whenever your machine has a natural pause point.
1. Lubricate All Grease Points
Your machine manual specifies the exact grease points and the lubricant grade. Don’t guess. Using the wrong grease can be worse than no grease at all: incompatible lubricants break down and lose their protective properties.
Common grease points on VFFS machines include:
- Cross-seal jaw pivot bearings: These carry high loads at high cycle rates. Two to three pumps of lithium-complex grease per fitting.
- Film carriage rails and slides (Light lubrication prevents binding and uneven film feed.
- Forming collar mounting hardware) Keeps the collar positioned accurately under vibration.
- Knife holder slides: Ensures clean, consistent cuts.
Wipe each grease fitting clean before attaching the grease gun. Forcing dirt into a bearing through a grease fitting is a great way to destroy it.
2. Check and Adjust Belt Tension
Inspect all drive belts, timing belts, and conveyor belts. Look for cracks, fraying, glazing, or stretch marks. Check tension by pressing on the belt midway between pulleys: it should deflect about 10–15mm under moderate finger pressure. Too tight and you’ll overload bearings. Too loose and you’ll get slipping, inconsistent timing, and bag length errors.
If your machine uses a servo-driven film pull system, check the timing belt that connects the servo encoder to the pull belt roller. A loose belt here means the encoder reads position incorrectly, and your bag lengths drift.
3. Clean All Sensors
Packaging machines rely on optical sensors, proximity sensors, and registration sensors to time every operation. Dust, film debris, and product residue coat sensor lenses over time. A dirty registration sensor misses the eye mark on your film, causing bag length errors. A dirty product-level sensor overfills or underfills pouches.
Clean each sensor lens with a soft, lint-free cloth. For optical sensors, use the cleaning method recommended by the sensor manufacturer: some lenses are coated and can be damaged by harsh chemicals.
4. Inspect the Cutting Blade
Whether your machine uses a rotating knife, a reciprocating blade, or a hot wire cutter, inspect the cutting edge weekly. A dull blade doesn’t cut cleanly: it tears the film, leaving jagged edges that weaken the end seal and create film scraps that contaminate the sealing area.
Rotate or replace cutting blades before they get dull enough to cause problems. Keep spare blades in your inventory. This is a consumable, not a repair item.
5. Verify Pull-Belt Condition
The pull belts (or pull wheels) on your VFFS machine grip the film and pull it through the forming collar to the correct bag length. Worn pull belts lose grip, causing film slippage and inconsistent bag lengths. Check the belt surface for wear patterns, glazing, or contamination. Clean rubber pull belts with a mild solvent. Replace belts that have lost their grip texture.
6. Check Electrical Connections
Vibration from high-speed packaging operations loosens electrical connections over time. A loose connection on a heating element causes intermittent seal failures. A loose connection on a servo drive causes position errors. A loose connection on a safety interlock causes nuisance shutdowns.
Open the main electrical enclosure and check for loose terminal blocks, disconnected wires, and signs of heat damage (discolored insulation, melted connectors). Don’t just look: gently tug on each wire to verify it’s secure. Check that all cable glands are tight. For machines rated IP65 or higher, verify that all enclosure seals are intact. A compromised IP65 seal lets dust and moisture into the electrical cabinet, and that’s a recipe for intermittent faults that are nearly impossible to diagnose.
Monthly Preventive Maintenance
Monthly maintenance digs deeper into the mechanical, electrical, and pneumatic systems: this is where you catch the problems that take weeks to develop and cost thousands when they finally fail.
Block two to three hours for monthly maintenance. This is real maintenance, not a quick check. Your production schedule should have a dedicated maintenance window for this.
1. Full Calibration of Fill System
If your machine includes an auger filler, volumetric cup filler, or liquid piston filler, verify its accuracy monthly. Run a fill test: dispense 20 consecutive fills into a container and weigh each one on a calibrated scale. Plot the results. You’re looking for two things: accuracy (is the average weight correct?) and consistency (what’s the standard deviation?)
If accuracy has drifted, recalibrate the fill volume per the machine manual. If consistency is poor, inspect the filling mechanism. Worn auger flights, leaking piston seals, and sticking diverter gates all cause fill weight variation. In regulated industries (pharmaceutical, food safety), fill accuracy compliance isn’t optional: it’s a legal requirement.
2. Inspect Heating Elements and Thermocouples
Remove the seal jaw covers and visually inspect all heating elements. Look for discoloration, cracking, or deformation. A failing heating element often shows visible damage before it stops working entirely. Check thermocouple connections: loose or corroded thermocouple connections cause inaccurate temperature readings, which means your PLC is controlling seal temperature based on bad data.
Test each heating element’s resistance with a multimeter if your machine manual provides the expected resistance values. An element that reads significantly higher or lower than spec is failing.
3. PLC Backup and Program Verification
This is a task most plants skip: until they lose a PLC program and spend three days trying to recreate machine settings from memory.
Connect to your machine’s PLC and create a full backup of the program and all parameter settings. Store the backup on a dedicated USB drive kept in a secure location (not in the machine room where it can get lost or damaged). Verify that the current program matches your last backup. If someone has changed parameters without documenting it, you need to know.
For machines with servo-driven systems, verify that the servo encoder alignment hasn’t drifted. Encoder misalignment causes position errors: bags cut in the wrong place, seals applied at the wrong position, product dispensed at the wrong time. Most servo drives have a built-in diagnostic that shows encoder position accuracy. Use it.
4. Pneumatic System Deep Inspection
Go beyond the daily moisture drain. Inspect the entire pneumatic system:
- Air lines: Look for kinks, cracks, or abrasion damage. Replace any lines that are deteriorating.
- Fittings: Check for leaks at every connection point. A soapy-water spray will bubble at leak points.
- Valves: Actuate each pneumatic valve manually and verify that it responds immediately and fully. Sluggish valves need cleaning or rebuilding.
- Cylinders: Check for external leakage around the rod seals. Internal leakage (air bypassing the piston) shows up as slow or inconsistent actuation.
5. Full Film Path Alignment Check
Using a straightedge or laser alignment tool (if available), verify that the film path is straight from the unwind stand through the forming collar to the pull belts. Misalignment in any section creates uneven film tension, which causes wrinkling, tracking errors, and back-seal quality issues.
Check the forming collar mounting. It should be parallel to the film feed and centered on the forming tube. Even small shifts (a fraction of a millimeter), affect seal quality on high-speed machines.
6. Clean and Inspect the Machine Frame
Wipe down the entire machine frame, removing product dust, film scraps, and grease buildup. Pay attention to the area under the forming collar and around the filling system: these are the highest contamination zones. Inspect the frame for cracks, loose bolts, or corrosion while you’re cleaning.
Quarterly Deep Maintenance
Quarterly maintenance is your defense against catastrophic failure: this is where you replace wear parts before they break, rebuild systems before they fail, and align the machine before drift becomes a production problem.
Schedule a full day for quarterly maintenance. If your machine runs multiple shifts, consider doing this every two months instead of quarterly. Higher utilization means faster wear.
1. Seal Jaw Assessment and Replacement
Remove the seal jaws completely. Inspect the sealing surface under magnification if possible. You’re looking for:
- Scoring or grooving on the sealing surface (this creates uneven seal pressure.
- Worn Teflon coating), if the coating is thin, patchy, or worn through to metal, replace the jaws or have them re-coated.
- Pivot bearing wear (the jaws should open and close smoothly with no side-to-side play.
- Heating element condition), replace heating elements proactively if they show any signs of degradation.
Most seal jaws last 6–12 months on single-shift operations. On multi-shift lines running abrasive films, they may need replacement every 3–4 months. Track jaw life so you can anticipate replacement rather than reacting to seal failures.
2. Gearbox Oil Change
If your machine has gear-driven components (some older VFFS models, flow wrappers, and cartoners use gear drives), change the gearbox oil quarterly or per the manufacturer’s recommended interval. Drain the old oil, inspect it for metal particles (a sign of gear wear), and refill with the specified grade.
For machines with direct-drive servo systems, this step doesn’t apply, but you should still verify that the servo motor couplings are tight and the mounting hardware is secure.
3. Pneumatic Valve Rebuild
Disassemble and clean the pneumatic valves that control your seal jaws, product gates, and film cutter. Replace the seals and O-rings inside each valve. This is a low-cost, high-impact maintenance task. A valve rebuild kit costs a fraction of what a valve failure costs in downtime and damaged product.
4. Complete Machine Alignment
Using dial indicators or laser alignment tools, verify the alignment of:
- Seal jaws (parallel to each other, centered on the forming tube
- Pull belts), parallel and at the correct spacing for your film thickness
- Forming collar (centered and at the correct height relative to the seal jaws
- Film unwind stand), perpendicular to the film path
Document all measurements. Over time, this documentation becomes invaluable: you can track drift trends and predict when components will need adjustment before they cause quality problems.
5. Electrical System Deep Check
- Tighten all terminal block connections. Thermal cycling (heating and cooling during operation) loosens screw terminals over time.
- Inspect contactors and relays. Look for pitted contacts, discolored housings, or a burning smell. Replace any that show wear.
- Verify all safety interlocks. Actuate each one and confirm the machine responds correctly. Safety systems that don’t work correctly aren’t safety systems: they’re liability.
- Check encoder and sensor cables. Look for abrasion, especially where cables pass through cable chains or cable tracks. Replace cables showing wear before they fail internally.
6. Full Test Run and Documentation
After completing all quarterly maintenance tasks, run the machine empty for 10–15 minutes. Then run a short production test with actual product and film. Verify:
- Seal quality (visual inspection and burst test)
- Bag length accuracy (measure 20 consecutive bags)
- Fill weight accuracy (weigh 20 consecutive fills)
- Cut quality (clean cuts, no dangling film tails)
- Date code placement and legibility
Document everything. Record all measurements, all parts replaced, all adjustments made. This documentation is your baseline for the next quarterly check. Without it, you’re guessing whether things are getting better or worse.
How to Build a Spare Parts Inventory
A well-stocked spare parts inventory turns a two-day downtime event into a two-hour repair: here’s how to build one that covers your critical needs without wasting capital on parts you’ll never use.
I’ve walked into maintenance rooms that had zero spare parts for machines that ran 16 hours a day. I’ve also seen rooms with $50,000 worth of spares that sat on shelves for years while the one part they actually needed was on three-week backorder. Both scenarios are expensive. Here’s how to get it right.
Tier 1: Must-Have Consumables (Keep on Hand at All Times)
These are the parts that wear out regularly and stop production when they fail:
- Seal bar Teflon tape or sleeves: Replace every 2–4 weeks depending on production volume
- Cutting blades (rotary knives, straight blades, or hot wire elements) (Keep at least two spares
- Heating elements for seal jaws) Keep one complete set per sealing station
- Thermocouples (Keep two spares; a failed thermocouple means your PLC can’t control temperature
- Drive belts and timing belts) One spare for each belt on the machine
- Pull belts or pull belt segments (Critical for film feed accuracy
- Fuses for the electrical system) Every size the machine uses
- Air filters for the FRL unit: Replace quarterly
- Light bulbs or LED indicators for sensors and HMI displays
Tier 2: Critical Wear Parts (Keep on Hand or Available Within 24 Hours)
These parts don’t fail as often, but when they do, production stops completely:
- Complete seal jaw assemblies (If your jaws are a custom size, lead time can be weeks
- Servo motors and servo drives) Expensive, but a failed servo means the machine is down until replacement arrives
- Pneumatic cylinders for seal jaws and product gates
- Forming collars and forming tubes (Custom parts with long lead times
- PLC backup battery) If this dies and you lose your program, you’re in trouble
- Sensor units (registration sensors, proximity sensors, safety light curtains)
- Gearbox assemblies for gear-driven machines
- Main drive motors
Tier 3: Insurance Parts (Order Based on Machine Age and Criticality)
These are the expensive, rarely-needed parts that you stock only if downtime cost justifies the carrying cost:
- Complete electrical enclosure or major sub-panels
- Machine mainframe components
- Custom forming collar sets for each bag size you run
Inventory Management Tips
Track lead times. For every part in your inventory, know the lead time from your supplier. A part with a 6-week lead time needs to be reordered before it’s the last one on the shelf.
Label everything. Every spare part should be labeled with the part number, the machine model it fits, and the minimum stock quantity. When someone grabs the last Teflon sleeve, they should know to reorder immediately.
Store electronics properly. Spare servo drives, PLCs, and sensor units should be stored in sealed bags with desiccant packets in a climate-controlled area. Moisture kills electronic components on the shelf just as effectively as it kills them in the machine.
Review annually. Every year, audit your spare parts inventory against your maintenance logs. Which parts did you actually use? Which parts sat untouched? Adjust your stocking levels accordingly.
When to Schedule Professional Service
You can handle most packaging machine maintenance in-house, but some tasks require specialized tools, training, or calibration equipment that only a factory-trained technician can provide.
Here’s how I think about it. Your in-house team handles the daily, weekly, and monthly checklists. You bring in professional service for the things that require factory-level diagnostics or manufacturer-specific tools.
Annual Professional Service Visit (Minimum)
At least once a year, have a factory-trained technician perform a thorough machine inspection. This visit should include:
- Complete machine calibration using manufacturer-specified tools and procedures
- Servo system tuning and encoder alignment using factory diagnostic software
- PLC program verification against the latest factory-standard program version
- Safety system certification: verifying that all safety interlocks, emergency stops, and guarding systems meet current standards
- Mechanical alignment verification using precision measurement tools
- Performance benchmarking: running the machine at rated speed and documenting output quality
The technician should provide a written report documenting the machine’s condition, any adjustments made, parts replaced, and recommendations for future maintenance or repairs.
When to Call for Service Sooner
Don’t wait for the annual visit if you notice any of these signs:
- Repeated component failures in the same subsystem. If you’ve replaced the same heating element three times in six months, something else is causing the failures: voltage issues, control system problems, or mechanical misalignment. A technician can diagnose the root cause.
- Performance degradation you can’t explain. Bag quality is dropping, fill weights are drifting, and your maintenance team has checked everything on the checklist. There may be an issue in the control system, a software problem, or a mechanical alignment issue that requires precision measurement tools.
- Unusual noise or vibration that persists after maintenance. This often indicates a bearing failure, gearbox problem, or structural issue that’s beyond routine maintenance.
- Electrical issues. Intermittent faults, nuisance shutdowns, or erratic behavior that doesn’t correspond to any mechanical problem. These can be extremely difficult to diagnose without specialized electrical test equipment and factory-level knowledge of the control system.
Choosing a Service Provider
If your machine is still supported by the manufacturer, start there. Factory technicians have access to the latest software, updated parts lists, service bulletins, and diagnostic tools specific to your machine model.
If the manufacturer is no longer available or responsive, look for an independent service provider with specific experience on your machine type. Generic “we service all packaging equipment” companies often lack the deep knowledge needed for efficient diagnosis. Ask for references from plants running the same machine model you have.
Need help? اتصل بنا and we can connect you with qualified service technicians for most major VFFS and pouch packaging machine brands.
التعليمات
How often should I perform preventive maintenance on my packaging machine?
Daily checks should take 5 minutes at the start of every shift. Weekly maintenance runs 20–30 minutes. Monthly deep maintenance needs 2–3 hours. Quarterly overhauls require a full day. The exact frequency depends on your production volume: if you’re running multiple shifts or abrasive products, double the frequency. The daily checks are non-negotiable regardless of how lightly the machine is used.
What’s the most important maintenance task on a VFFS machine?
Cleaning and inspecting the seal jaws daily. Seal failures are the number one cause of production stops on VFFS machines, and they’re almost always preventable. Film residue builds up on seal bars as an insulating layer, causing the machine to compensate with higher temperatures. That compensation masks the problem until it cascades into wrinkling, film tears, or seal jaw damage. Five minutes of cleaning prevents all of it.
How do I know when to replace seal jaws vs. just cleaning them?
Look at the sealing surface under good light. If it’s smooth and even after cleaning, you’re fine. If you see scoring, grooving, pitting, or the Teflon coating is worn through to bare metal, it’s time to replace or re-coat. Also watch for uneven seal quality: if one end of the seal is consistently weaker than the other, the jaw may be warped and needs replacement. Most facilities get 6–12 months from a set of seal jaws on single-shift operations.
Can I do packaging machine maintenance myself, or do I need a technician?
Daily, weekly, and monthly maintenance tasks can all be handled by trained operators or in-house maintenance staff. These are routine inspections, cleaning, lubrication, and basic adjustments. Quarterly deep maintenance and annual service visits should involve someone with factory training and specialized diagnostic equipment. The key is making sure your in-house team is properly trained on the specific tasks and knows when to escalate.
What lubricants should I use on my packaging machine?
Use only the lubricants specified in your machine manual. Different components require different lubricant types: lithium-complex grease for bearings, food-grade grease for product-contact areas, specific oil grades for gearboxes, dry lubricants for certain sliding surfaces. Using the wrong lubricant can cause more damage than no lubricant at all. For machines with SS304 contact parts processing food or pharmaceutical products, use only NSF H1-registered food-grade lubricants on any component near the product zone.
How do I convince management to invest in preventive maintenance?
Track your unplanned downtime hours and costs for three months. Then implement the daily checklist for three months and track the difference. The numbers speak for themselves: many plants see a meaningful reduction in unplanned downtime within the first quarter of consistent preventive maintenance. Frame it in management’s language: downtime cost per hour multiplied by hours saved. The ROI is usually clear.
Ready to Build Your Maintenance Program?
You’ve got the checklist. You know what to check daily, weekly, monthly, and quarterly. You know which spare parts to stock and when to call in professional help. The only thing left is to start.
Share your machine model and we’ll send you a customized checklist tailored to your specific equipment, production schedule, and product type. We’ve built maintenance programs for packaging lines across many product categories, and we can build one for yours.
Contact us with your machine model, shift schedule, and product type, and we’ll put together a tailored preventive maintenance plan for you.